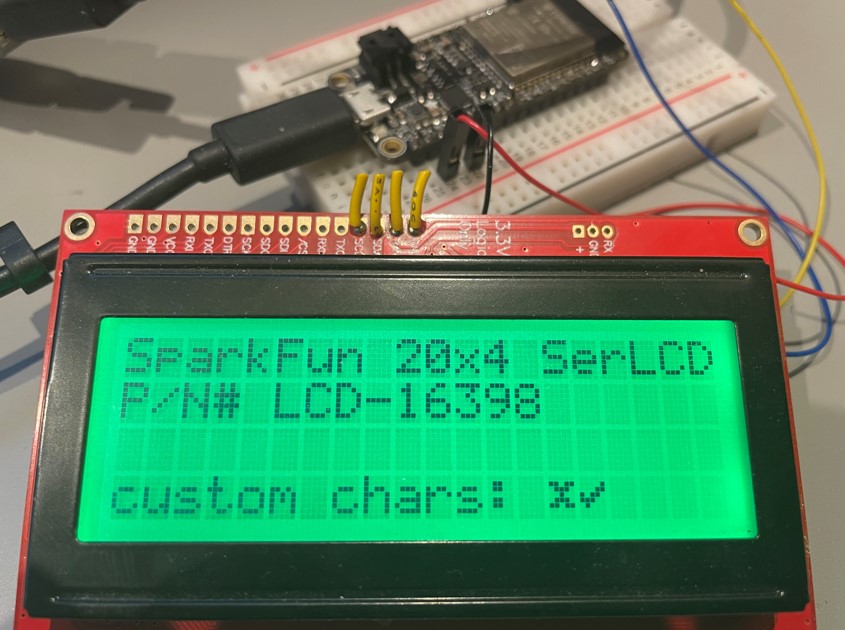
LCD library for SparkFun RGB Serial Open LCD display (sizes 20x4 or 16x2) with I2C connection
Use SparkFunLcd.cs to drive SparkFun LCD modules via I2C.
For example product information see SparkFun LCD-16398
The code contained in this driver is based on see OpenLCD
Usage
For instance the following code writes a simple message to the display,
var settings = new I2cConnectionSettings(busId: 1, deviceAddress: SparkFunLcd.DefaultI2cAddress, busSpeed: I2cBusSpeed.StandardMode);
using (var i2cDevice = I2cDevice.Create(settings))
{
    using (var lcd = new SparkFunLcd(i2cDevice, SparkFunLcd.DisplaySizeEnum.Size20x4))
    {
        lcd.SetBacklight(Color.FromArgb(0, 255, 0));
        lcd.SetContrast(4);
        lcd.SetDisplayState(false);
        lcd.Clear();
        lcd.Write(0, 0, "SparkFun 20x4 SerLCD");
        lcd.Write(0, 1, "P/N# LCD-16398");
        lcd.SetDisplayState(true);
    }
}
(code validated against Adafruit Huzzah32 Feather)

Custom Characters
- As shown in the photo above custom characters can be defined
- Up to eight custom characters can be defined numbered 0x0 thru 0x7
- for information on generating the byte array character bit mask see link
// demonstrating custom characters
{
    lcd.CreateCustomCharacter(0, new byte[] { 0x0, 0x1b, 0xe, 0x4, 0xe, 0x1b, 0x0, 0x0 }); // define custom character 0x0
    lcd.CreateCustomCharacter(1, new byte[] { 0x0, 0x1, 0x3, 0x16, 0x1c, 0x8, 0x0, 0x0 }); // define custom character 0x1

    lcd.Clear();
    lcd.SetCursorPosition(0, 0);
    lcd.Write(new char[] { '\x0', '\x1' }); // write custom character 0x0 followed by custom character 0x1
}
Important note on use of I2C pins
Important: make sure chip pins are properly configured as I2C pins, for instance for ESP32,
// configure ESP32 device I2C bus
{
    // note: actual pin-out is specific to Adafruit Huzzah32 Feather on which code was tested
    int dataPin = Gpio.IO23;
    int clockPin = Gpio.IO22;
    Configuration.SetPinFunction(dataPin, DeviceFunction.I2C1_DATA);
    Configuration.SetPinFunction(clockPin, DeviceFunction.I2C1_CLOCK);
}